C# JWT Authentication .NET 6
Table of Contents
In this article, we will work on implementing C# JWT Authentication using .NET 7 - which also works for .NET 6, and preview .NET 8 - using ASP.NET Core.
Security is a significant concern today, with so much sensitive information, and not so much sensitive ones, being transmitted across the internet. One way to ensure that only authorized users access restricted information is through authentication.
OAuth 2 and JWT Tokens (JSON Web Token) are the most common ways to ensure modern Web Applications and Mobile Applications authentication.
📢 Table of Contents #
In this issue, we’re going to cover the following topics:
- What are Access Token, JWT Token, and Bearer Authorization
- Set Up Authentication and Authorization (skip to this section if you want just the code)
- Generate the JWT Token / Access Token
- Testing the Endpoints
- Conclusion
🧾 What are Access Token, JWT Token, and Bearer Authorization? #
Access tokens, JWT tokens, and Bearer Authorization are commonly used in web applications to authenticate users and provide access to protected resources.
An Access Token is a ticket to authenticate a user and access a protected resource.
JWT Token, on the other hand, is a specific type of Access Token encoded as a JSON object, hence JSON Web Token.
It consists of a header, a payload, and a signature, and it is commonly used in modern web applications.
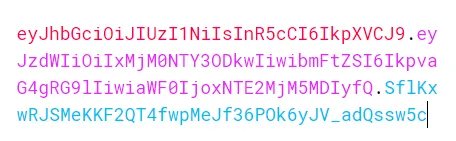
Sample JWT Token
> This is a Raw JWT Token

Token Header + Payload + Signature
> This is the Decoded JWT Token
In addition, the JWT token can contain various claims, such as the user’s id, expiration date, and application permissions.
Bearer Authorization is a mechanism for transmitting Access Tokens in HTTP requests. It involves including the Access Token in the Authorization header of the HTTP request using the Bearer Authentication Scheme.
The Bearer Scheme indicates that the token being transmitted is an Access Token, allowing the server to authenticate the user and grant access to protected resources.
For example:

Request Access Token + Accessing Protected Resource
- The Resource Owner sends a request to
/tokens/connect/with his username and password - The server validates the request and generates a valid Access Token in the format of a JWT Token, and returns it to the client
- The client includes the token in the Authorization header (with the Bearer scheme) in the subsequent requests to the server
- The server verifies the token before granting access to protected resources
Set Up Authentication and Authorization #
From this point, we are going to implement the JWT Authentication using C# .NET Web API.
💡
Here is the full source code: https://github.com/ricardodemauro/Labs.JwtAuthentication
Step 1: Create the Project #
For our project, we will use C# .NET 7 and start from the Empty Web Project, which is enough for our POC (proof of concept).
Let’s name our project Labs.JwtAuthentication.
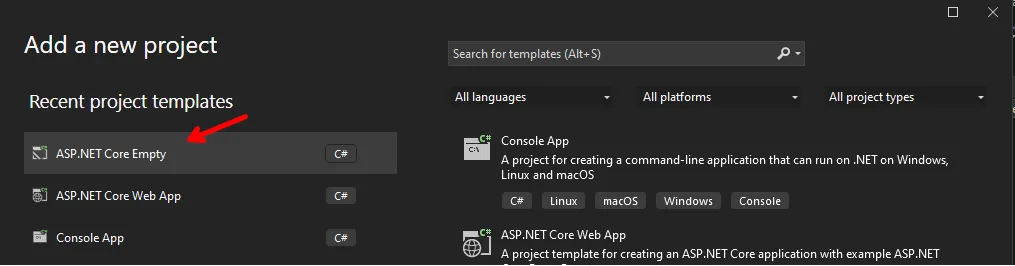
Visual Studio Asp.Net Core Empty Template
After completion of creation, our project should look like this:
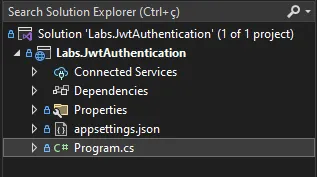
The solution in Visual Studio
Step 2: Installing the dependency packages #
Our next step is to install the necessary NuGet packages:
dotnet add Microsoft.AspNetCore.Authentication.JwtBearer
dotnet add System.IdentityModel.Tokens.Jwt
Nuget Packages to Install
💡
If you choose to use .NET 6 or a different version.
You should use the package version according to the framework restriction.
After the installation of all of the packages, we should end with something like this:

Installed Packages
Step 3: Adding Variables to the Configuration File #
In this next step, let’s create the configurations for the Audience, Issuer, and Signing Key in our appsettings.json.
We will use them to generate the JWT Token (Access Token) and to validate it in the Authentication process.
{
  //👇 JWT Configurations
  "JwtOptions": {
    "Issuer": "https://localhost:7004",
    "Audience": "https://localhost:7004",

    //👇 Used to encrypt and decrypt the jwt token
    "SigningKey": "some-signing-key-here",

    // token expiration time
    "ExpirationSeconds": 3600
  }
}
appsettings.json with JwtOptions
Next, let’s create a record class to hold this configuration and use it in the application:
namespace Labs.JwtAuthentication;

public record class JwtOptions(
    string Issuer,
    string Audience,
    string SigningKey,
    int ExpirationSeconds
);
More on C# Records #
https://learn.microsoft.com/en-us/dotnet/csharp/language-reference/builtin-types/record
Finally, we will read the configuration and map it to JwtOptions as a Singleton lifetime. Of course, you can also use the Options pattern if you prefer.
var builder = WebApplication.CreateBuilder(args);

var jwtOptions = builder.Configuration
	.GetSection("JwtOptions")
    .Get<JwtOptions>();

builder.Services.AddSingleton(jwtOptions);
Adding JwtOptions object to Services
This allows us access to the JwtOptions object at any time in the application.
Step 4: Configure the Authentication and Authorization Services #
In action, we will configure the Authentication and Authorization services to validate the JWT token when it exists in the HTTP Authorization header.
// 👇 Configuring the Authentication Service
builder.Services.AddAuthentication(JwtBearerDefaults.AuthenticationScheme)
    .AddJwtBearer(opts =>
    {
        //convert the string signing key to byte array
        byte[] signingKeyBytes = Encoding.UTF8
        	.GetBytes(jwtOptions.SigningKey);

        opts.TokenValidationParameters = new TokenValidationParameters
        {
            ValidateIssuer = true,
            ValidateAudience = true,
            ValidateLifetime = true,
            ValidateIssuerSigningKey = true,
            ValidIssuer = jwtOptions.Issuer,
            ValidAudience = jwtOptions.Audience,
            IssuerSigningKey = new SymmetricSecurityKey(signingKeyBytes)
        };
    });

// 👇 Configuring the Authorization Service
builder.Services.AddAuthorization();
In the code snippet above, we have configured the Authentication service to:
- Adds the Bearer Scheme as the default scheme for authentication
- ValidateIssuer: validate who token generated the token (the Issuer)
- ValidateAudience: validate for whom it was generated (the audience)
- ValidateToken: check if it is not expired
- ValidateIssuerSigningKey: validate the token signature
This is the most common and minimal validation setup we should use when working with JWT Tokens.
Last, we have added the Authorization service with the default configuration.
Step 5: Set Up Authentication and Authorization Middleware #
In this final step, we will include the Authentication and Authorization middlewares in the pipeline to validate the requests with the JWT Token.
More on Minimal APIs #
https://rmauro.dev/create-a-minimal-api-with-dotnet-6/
And finally, let’s indicate which route should be authorized (non-public) and allow anonymous (public) requests.
var app = builder.Build();

// 👇 This add the Authentication Middleware
app.UseAuthentication();
// 👇 This add the Authorization Middleware
app.UseAuthorization();

// 👇 The routes / and /public allow anonymous requests
app.MapGet("/", () => "Hello World!");
app.MapGet("/public", () => "Public Hello World!")
	.AllowAnonymous();

// 👇 The routes /private require authorized request
app.MapGet("/private", () => "Private Hello World!")
	.RequireAuthorization();

// 👇 handles the request token endpoint
app.MapPost("/tokens/connect", (HttpContext ctx, JwtOptions jwtOptions)
    => TokenEndpoint.Connect(ctx, jwtOptions));

app.Run();
Until here, we have completed the setup of the Authentication and Authorization process.
Our application can authenticate and authorize our requests with an Access Token.
Generate the JWT Token / Access Token #
From this step forward, we will implement the endpoint to create the JWT Tokens (Access Tokens).
The endpoint skeleton should have this format:
POST /connect/token HTTP/1.1
Content-Type: application/x-www-form-urlencoded

grant_type=password&username=johndoe&password=A3ddj3wr
HTTP Request
And the response should be:
HTTP/1.1 200 OK
Content-Type: application/json;charset=UTF-8

{
  "access_token": "some-access-token-here",
  "token_type": "bearer",
  "expires_in": 3600
}
HTTP Response
Implementing a Route to Create the JWT Token #
Let’s create a static class TokenEndpoint. This class will contain all the logic to handle the /connect/token request and generate the tokens.
namespace Labs.JwtAuthentication.Endpoints;

public static class TokenEndpoint
{
	//handles requests from /connect/token
    public static async Task<IResult> Connect(
        HttpContext ctx,
        JwtOptions jwtOptions)
    {
    	throw new NotImplementedException();
    }

    //
    static (string, DateTime) CreateAccessToken(
        JwtOptions jwtOptions,
        string username,
        string[] permissions)
    {
    	throw new NotImplementedException();
    }
}
Barebones of the TokenEndpoint class
Let’s implement the method CreateAccessToken:
static string CreateAccessToken(
    JwtOptions jwtOptions,
    string username,
    TimeSpan expiration,
    string[] permissions)
{
    var keyBytes = Encoding.UTF8.GetBytes(jwtOptions.SigningKey);
    var symmetricKey = new SymmetricSecurityKey(keyBytes);

    var signingCredentials = new SigningCredentials(
        symmetricKey,
        // 👇 one of the most popular.
        SecurityAlgorithms.HmacSha256);

    var claims = new List<Claim>()
    {
        new Claim("sub", username),
        new Claim("name", username),
        new Claim("aud", jwtOptions.Audience)
    };

    var roleClaims = permissions.Select(x => new Claim("role", x));
    claims.AddRange(roleClaims);

    var token = new JwtSecurityToken(
        issuer: jwtOptions.Issuer,
        audience: jwtOptions.Audience,
        claims: claims,
        expires: DateTime.Now.Add(expiration),
        signingCredentials: signingCredentials);

    var rawToken = new JwtSecurityTokenHandler().WriteToken(token);
    return rawToken;
}
Create Access Token Method
The CreateAccessToken method will generate the token with claims:
- sub: Unique identifier for the end-user
- name: End-user full name
- aud: Audience(s) that this Token is intended for.
- role: User role(s)
A JWT Token can handle various pre-defined and custom claims.
Next, let’s add the implementation of the method Connect:
public static async Task<IResult> Connect(
    HttpContext ctx,
    JwtOptions jwtOptions)
{
	// validates the content type of the request
    if (ctx.Request.ContentType != "application/x-www-form-urlencoded")
        return Results.BadRequest(new { Error = "Invalid Request" });

    var formCollection = await ctx.Request.ReadFormAsync();

	// pulls information from the form
    if (formCollection.TryGetValue("grant_type", out var grantType) == false)
        return Results.BadRequest(new { Error = "Invalid Request" });

    if (formCollection.TryGetValue("username", out var userName) == false)
        return Results.BadRequest(new { Error = "Invalid Request" });

    if (formCollection.TryGetValue("password", out var password) == false)
        return Results.BadRequest(new { Error = "Invalid Request" });

	//creates the access token (jwt token)
    var tokenExpiration = TimeSpan.FromSeconds(jwtOptions.ExpirationSeconds);
    var accessToken = TokenEndpoint.CreateAccessToken(
        jwtOptions,
        userName,
        TimeSpan.FromMinutes(60),
        new[] { "read_todo", "create_todo" });

    //returns a json response with the access token
    return Results.Ok(new
    {
        access_token = accessToken,
        expiration = (int)tokenExpiration.TotalSeconds,
        type = "bearer"
    });
}
Implementation of Connect method
The Connect method reads the form and validates each property before generating the access token. Once everything is set, we call the method CreateAccessToken method.
Finally, let’s include Map the route /tokens/connect POST.
app.MapPost("/tokens/connect", (HttpContext ctx, JwtOptions jwtOptions)
    => TokenEndpoint.Connect(ctx, jwtOptions));
With all of this, we have a complete application capable of generating and validating access tokens in the format of JWT Tokens.
Testing the Endpoints #
Create a valid HTTP Request using Visual Studio, Visual Studio, Postman, Insomnia, or any tool that you like.
💡
You can use the .http file with all API calls in the code sample.
https://github.com/ricardodemauro/Labs.JwtAuthentication/blob/master/http-test.http
A Sample Request to Get a Valid Access Token: #
POST https://localhost:7004/tokens/connect HTTP/1.1
Content-Type: application/x-www-form-urlencoded

grant_type=password&username=johndoe&password=A3ddj3wr
Result of Connect Endpoint:
HTTP/1.1 200 OK
Connection: close
Content-Type: application/json; charset=utf-8
Date: Thu, 27 Apr 2023 17:35:45 GMT
Server: Kestrel
Transfer-Encoding: chunked

{
  "access_token": "eyJhbGciOiJIUzUxMiIsInR5cCI6IkpXVCJ9.eyJz......",
  "expiration": 3600,
  "type": "bearer"
}
Making a Request Without Access Token to Private Route: #
GET https://localhost:7004/private
HTTP 401 - Unauthorized Result of Private Route:
HTTP/1.1 401 Unauthorized
Content-Length: 0
Connection: close
Date: Thu, 27 Apr 2023 17:36:27 GMT
Server: Kestrel
WWW-Authenticate: Bearer
Making a Request With Access Token to Private Route #
GET https://localhost:7004/private
Authorization: Bearer eyJhbGciOiJIUzUxMiIsInR5cCI6IkpXVCJ9.eyJz......
HTTP 200 - Ok Result of Authorized Route:
HTTP/1.1 200 OK
Connection: close
Content-Type: text/plain; charset=utf-8
Date: Thu, 27 Apr 2023 17:37:10 GMT
Server: Kestrel
Transfer-Encoding: chunked

Private Hello World!
Conclusion #
JWT authentication is a secure and effective way to authenticate users in web applications.
C# .NET provides a simple and easy-to-implement way to use JWT Authentication and Authorization.
Following the steps outlined in this article, you can implement JWT Authentication in your C# .NET 8 Web Applications and ensure that only authorized users can access protected resources.