SSH Exposed to Internet - 8 steps check list
Table of Contents
Exposing virtual machines to the internet it’s not an easy task. Often managed using an SSH connection we must secure our machines as much as we can against hacker attacks.
Let’s go through some often and ease configurations that will make it an attacker hard if trying to access your machine.
💬 In this issue #
- Creating a non-root user and use eventually elevated privileged
- Enabling UFW Uncomplicated Firewall
- Unattended Upgrades
- Hardening the SSH Access
👉 Information we’ll use in our lab #
User: root
Password: generated with a password generator
Description: Our Root user
User: secondary
Password: generated with a password generator
Description: Non Root user for daily basis access
Operating System: Ubuntu Server 20.04 - but it also working for different flavors of Linux.
Creating a non-root user #
First thing first: Never use the root user for non-privilege tasks.
To accomplish that let’s create a non-root user and use the sudo command to elevate our privileges only when necessary.
Logged as the root user let’s create a non-root user called secondary. Execute the following command in our bash shell.
# create a regular user with name secondary
$ adduser secondary
Creating the Secondary User
We should answer some questions (starting with the password) and we shall have the user.
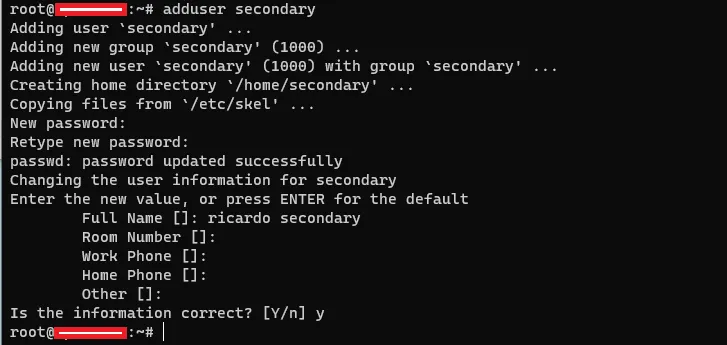
Creating the secondary user
Now we have a user with fewer privileges. The next step is to grant the use sudo command when necessary.
Add to Sudo Group #
Run usermodcommand to include secondary into sudo group.
# includes the secondary into sudo group
$ usermod -aG sudo secondary
Including the Secondary user in the sudo group
Now we’re able to use sudo in front of a command to run as administrative rights.
Enabling UFW Uncomplicated Firewall #
UFW is the default firewall system (under the hood is the great IPTables) in Ubuntu Server.
With the use of ufw it’s very simple to allow or block a port.
$ sudo ufw allow 22
Allowing port 22 (SSH default port) on the UFW firewall
Don’t forget to use sudo - we should be using the secondary user instead of the root
$ sudo ufw default deny incoming
$ sudo ufw default allow outgoing
$ sudo ufw enable
Deny all incoming by default, allow outgoing, and finally enable the ufw service
Deny all incoming by default, allow outgoing, and finally enable the ufw service
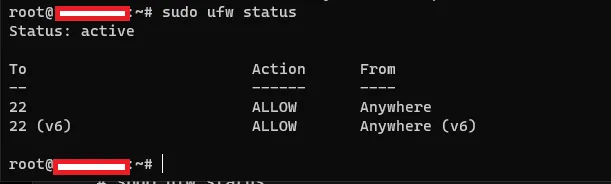
$ sudo ufw status
Displaying Status of ufw Service
Displaying Status of ufw Service
Great. Now we have ufw up and running.
Adding Unattended Upgrades #
Unattended-Upgrade is a service that regularly checks and updates the OS packages.
The purpose of unattended-upgrades is to keep the computer current with the latest security (and other) updates automatically.
https://wiki.debian.org/UnattendedUpgrades
$ sudo apt install unattended-upgrades

$ sudo systemctl status unattended-upgrades.service
Install unattended upgrades and enable it
After installing just enable the service and we should be good.
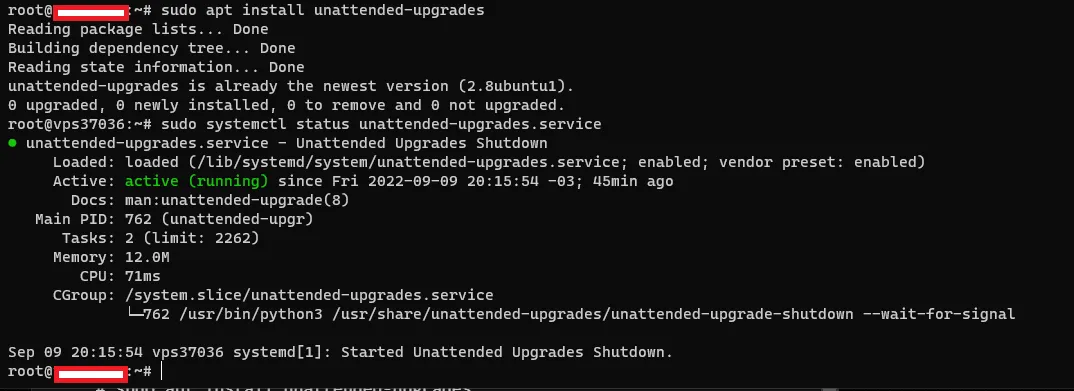
Unattended upgrades Status
The default configuration will automatically retrieve new package updates for most of the packages included in the Ubuntu repositories.
Hardening the SSH Configuration #
Most Linux servers are administered remotely using SSH using OpenSSH technology. Which is the default SSH server software used within Ubuntu.
This is one of the major vectors of attack by hackers on Linux exposed on the internet. Let’s work on improving the configurations of our SSH server.
Using SSH keys instead of passwords #
SSH keys are the recommended way to log into any Linux server environment remotely.
Back in our client machine (not on the server) let’s create a pair of keys - private and public keys. This also works on Windows 10/11.
$ ssh-keygen
You can specify a different location to save the keys if you like.
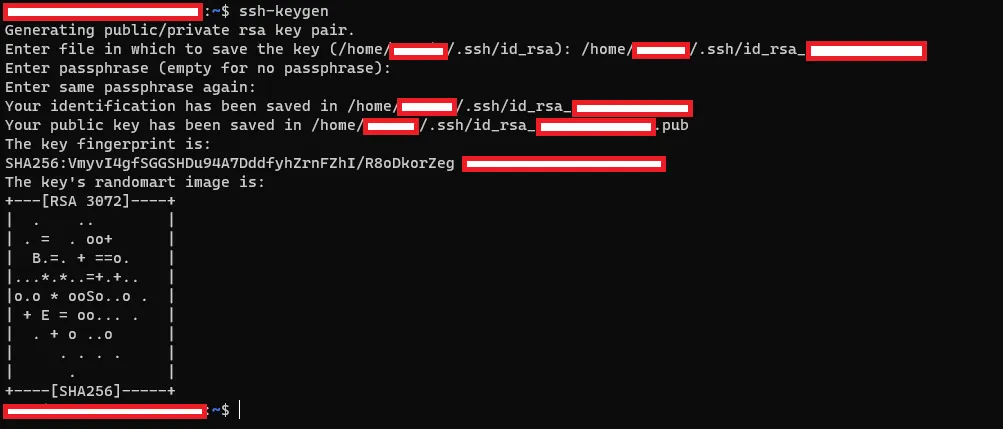
Generating the Public and Private Keys
The next step is to copy the SSH key to the Ubuntu server.
$ cat /home/{username}/.ssh/id_rsa.pub
Copy the content output to the transfer area.
Back into our server
# create .ssh if not created
$ sudo mkdir -p ~/.ssh

# copy the public key to authorized_keys file
$ sudo echo public_key_string >> ~/.ssh/authorized_keys

# remove all permissions on .ssh folder
$ sudo chmod -R go= ~/.ssh

# adding read permission to our user - our scenario is secondary - on .ssh folder
$ chown -R secondary:secondary ~/.ssh
Now we have the public key generated by our client machine in the server in the property location and with permissions in place.
This is it. Now we’re able to log in using the recently created SSH Key. Let’s try.
# ssh -i (indicates where is the key)
$ ssh -i $HOME/.ssh/id_rsa secondary@{SERVER-IP}
Using SSH Key to log into the Server
Changing default Port for SSH #
Open the SSH configuration file sshd_config with a text editor.
$ sudo nano /etc/ssh/sshd_config
Look for the entry Port 22 - it could be commented on. Replace it with the desired value - port between 1024 and 65536
. . .
Port 2222
. . .
Port Configuration
Save and Restart the OpenSSH service.
$ sudo systemctl restart ssh
Restarting the SSH service
Disable Password Authentication over SSH #
Change property to PasswordAuthentication no
. . .
PasswordAuthentication no
. . .
Password Authentication Configuration
Disable Root User Login #
Change property to PermitRootLogin no
. . .
PermitRootLogin no
. . .
Password Authentication Configuration
Tweaking some other sshd_config Configurations #
Open the config file sshd_config one more time
$ sudo nano /etc/ssh/sshd_config
. . .
MaxAuthTries 3
. . .
Enable lock when 3 fails attempts
. . .
PermitEmptyPasswords no
. . .
Do not allow Empty Passwords
Test and Restart the SSH Service to reflect the new configuration
# test the configuration changes
$ sudo sshd -t

# restart the service and load the new configuration
$ sudo systemctl restart ssh
Testing and Restarting SSH service
Using ssh config file on SSH Client #
Adding a config file in the .ssh folder on the ssh client allows us to define the key, host, user, and other configurations by default per connection.
In our Client’s machine
Create the config file in ~/.ssh/config location
# THIS IS OUR CLIENT - NOT OUR UBUNTU SERVER
$ nano ~/.ssh/config
Past the following content.
# connection name
Host ssh-server

   # host address (ip or hostname)
   Hostname 192.168.0.100

   # port of ssh server
   Port 2222

   # user
   User secondary

   # private key to use
   IdentityFile ~/.ssh/id_rsa_locaweb_secondary
config file
Then we can connect using only the connection name
$ ssh ssh-server
Connecting to remote server
😎 Final thoughts #
Wow, finally we made it. That is enough!
Of course, we can keep going hardening it even more adding more protection - it never stops.
Share in the comments section what you would do to make it even better or different.
❤️ Enjoy this article? #
Forward to a friend and let them know.